In this article, we will discuss 3 methods to import an Excel file into SAS.
You can import an Excel file with the PROC IMPORT procedure, the LIBNAME statement, or the Import Data wizard in SAS University Edition. It is not possible to import an Excel with a SAS Data Step.
Contents
Sample Data
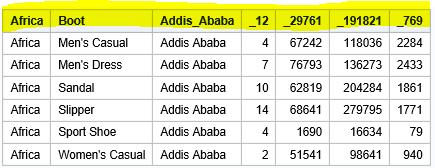
In the examples in this article, we will import the file “shoes.xlsx“. This file has 395 rows (excluding the header) and 7 columns.
Below we show the first 10 rows.
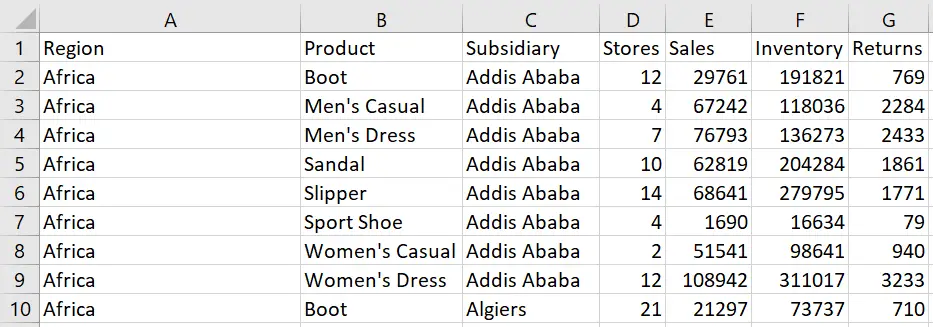
The file above is based on the SHOES dataset from the SASHELP library. To follow the examples in this article, you could export this dataset as an Excel file first and save it as “shoes.xlsx“.
Import an Excel File into SAS with PROC IMPORT
The easiest method to import an Excel File into SAS is with PROC IMPORT. The PROC IMPORT procedure provides you great flexibility. For example, you can specify the sheet you want to import and start the import from the second row.
How to Import an Excel File into SAS with PROC IMPORT
These are the steps to import an Excel File in SAS:
1. Define the location, file name, and file extension
The first argument of the PROC IMPORT procedure is the FILE=-argument. This argument specifies the location, file name, and file extension of the Excel file. This information must be enclosed in double-quotes.
2. Specify the SAS output dataset
The second argument of the PROC IMPORT procedure is the OUT=-argument. This argument identifies the name of the SAS output dataset.
3. Specify the type of data to import
The third argument of the PROC IMPORT procedure is the DBMS=-argument. DBMS stands for Database Management Systems and specifies the file type of data to import. For example, CSV, XLSX, or TXT.
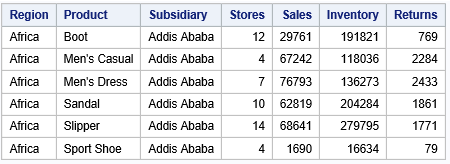
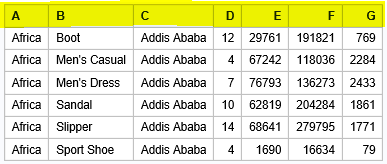
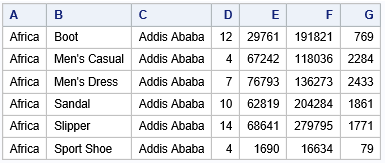
The code below shows how to import the shoes.xlsx file and create the SAS dataset work.shoes with PROC IMPORT.
proc import file="/folders/myfolders/import/shoes.xlsx"
    out=work.shoes
    dbms=xlsx;
run;

proc print data=work.shoes (obs=6) noobs;
run;
If you run the code above, SAS writes a message to the log indicating how many rows and columns were imported.

The image below shows the data that SAS imported.
How to Override an Existing Data Set
By default, the PROC IMPORT procedure doesn’t overwrite existing datasets. For example, if you re-run the code above, SAS writes a note to the log and cancels the import.
proc import file="/folders/myfolders/import/shoes.xlsx"
    out=work.shoes
    dbms=xlsx;
run;

So, how can you overwrite an existing SAS dataset while reading an Excel file? You can add the REPLACE option to the PROC IMPORT procedure to overwrite a SAS dataset.
The REPLACE option must be placed after the DBMS=-argument.
proc import file="/folders/myfolders/import/shoes.xlsx"
    out=work.shoes
    dbms=xlsx
    replace;
run;
How to Import an Excel File without Header
The PROC IMPORT procedure expects that the first row of your file contains a header. But, how do you import an Excel file into SAS without a header?
The file shoes_no_header.xlsx contains the data of the SHOES dataset from the SASHELP library, but without a header.
If you use the standard code to import an Excel file, SAS converts the first row into the column names of the new dataset.
proc import file="/folders/myfolders/import/shoes_no_header.xlsx"
    out=work.shoes
    dbms=xlsx
    replace;
run;

proc print data=work.shoes (obs=6) noobs;
run;
To import an Excel file without a header, you need the GETNAMES=-option. This option lets the PROC IMPORT procedure know that the CSV file has column names or not.
By default, the value of the GETNAMES=-option is YES. However, if the import file doesn’t have a header, you need to use GETNAMES=NO.
The code below shows how to use the GETNAMES=-option.
proc import file="/folders/myfolders/import/shoes_no_header.xlsx"
    out=work.shoes
    dbms=xlsx
    replace;
    getnames=no;
run;

proc print data=work.shoes (obs=6) noobs;
run;
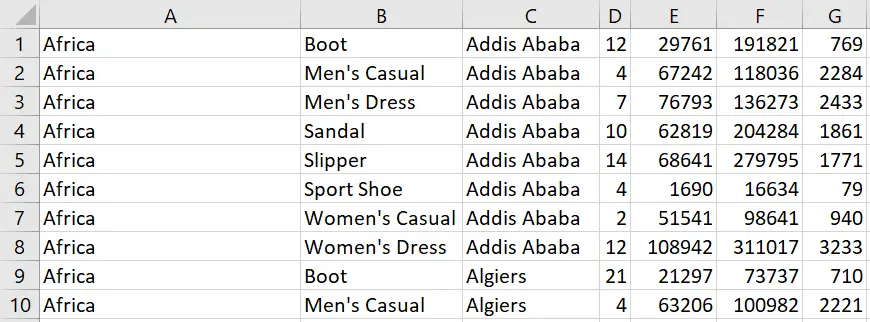
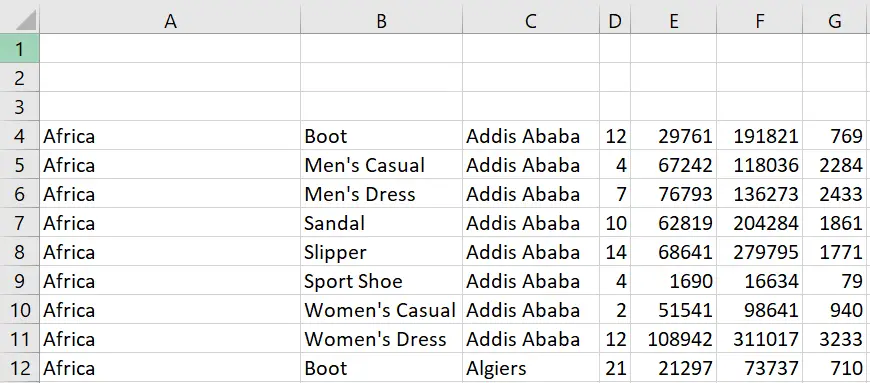
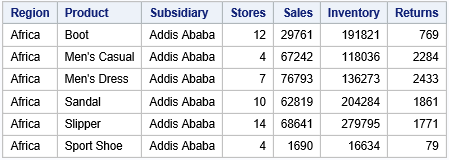
If you use the GETNAMES=NO option, then SAS sets the variables names to A, B, C, etc. Moreover, the first row of the Excel file is the first row of the data set.
The image below shows the result of importing an Excel file with the GETNAMES=NO options.
After importing the file, you can change the column names with the RENAME=-option.
Do you know? How to Rename Variables in SAS
How to Define the Start Row of an Excel File
Normally, the data of an Excel file starts on the first row. But, how do you import an Excel file with data not starting at the first row?
For example, the shoes_startrow.xlsx file contains the data of the SHOES dataset from the SASHELP library. However, in contrast to previous examples, the data starts in the fourth row.
If you would run the standard code of the PROC IMPORT procedure, SAS creates a dataset where the first rows are completely blank.
proc import file="/folders/myfolders/import/shoes_startrow.xlsx"
    out=work.shoes
    dbms=xlsx
    replace;
run;

proc print data=work.shoes (obs=6) noobs;
run;
You could use a filter to remove the blank rows. Obviously, this is not an optimal solution. So, how do you select a starting row when you import an Excel file?
You can use the DATAROW=-option to start the import of an Excel file from a specified row. If you use this option, the GETNAMES=-option won’t work. The GETNAMES=-option only works if the variable names are in the first row.
In the example below, we use the DATAROW=-option to read an Excel file where the data starts at the 4th row.
proc import file="/folders/myfolders/import/shoes_startrow.xlsx"
    out=work.shoes
    dbms=xlsx
    replace;
    datarow=4;
run;

proc print data=work.shoes (obs=6) noobs;
run;
After importing the file, you need the RENAME=-option to change the column names.
So, you can use the DATAROW=-option to define the first row with data in your Excel file. However, a similar option to define the first column with data doesn’t exist.
If your Excel file has empty columns, you can still import it and remove the empty columns afterward.
How to Import a Range of an Excel File
Normally, when you read an Excel file into SAS, you want the entire sheet. However, it might happen that you are interested in just a selection of the data. So, how to import a specific range of data into SAS?
You read a specific range from an Excel file into SAS with the RANGE=-option of the PROC IMPORT procedure. This option specifies the Excel sheet and the cells that SAS will import. The range must be written between (double) quotes.
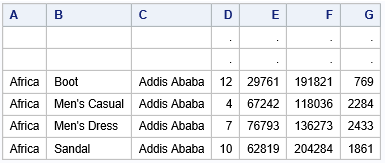
For example, we would like to import the range of cells highlighted in blue from the sheet “Sheet1“.
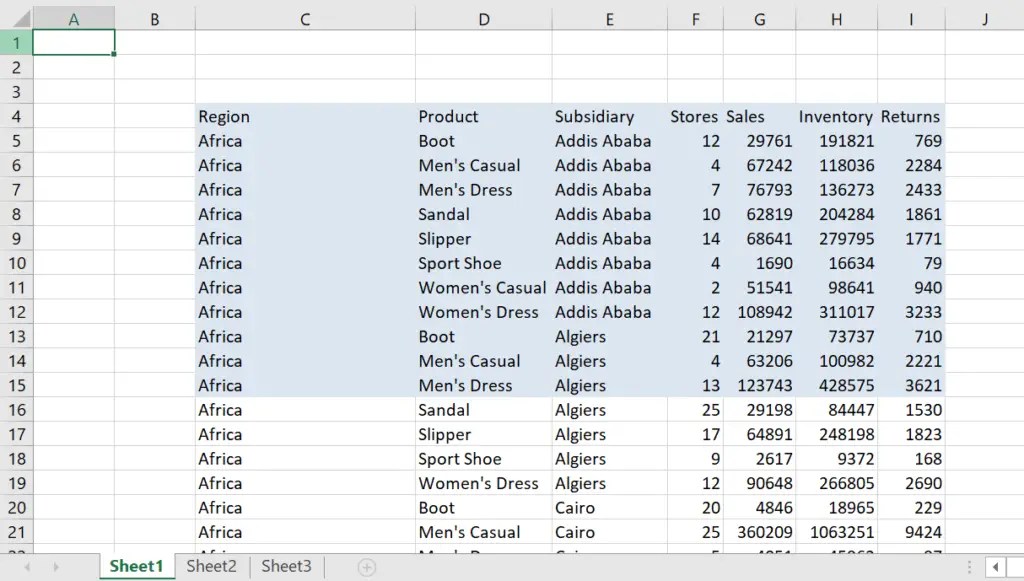
We can use the RANGE=-option to specify the range we want to import into SAS. To read only the blue cells, we use RANGE=”Sheet1$C4:I15″.
proc import file="/folders/myfolders/import/shoes_range"
    out=work.shoes
    dbms=xlsx
    replace;
    range="Sheet1$C4:I15";
run;
When you use the RANGE=-option to import a selection of an Excel file, SAS assumes that the first row contains the column names.
How to Import a Specific Sheet of an Excel File
An Excel file can contain one or more sheets. By default, SAS imports the first sheet. However, how to import a specific sheet from an Excel file into SAS?
The SHEET=-option of the PROC IMPORT procedure lets you specify the sheet you want to import. You must write the name of the sheet between (double) quotes. With the SHEET=-option you can also import sheets with spaces in their names.
In the example below, our Excel file has three sheets. We want to import the sheet “Sheet2“.

The following SAS code shows an example of how to import a specific sheet. To import “Sheet2“, we use SHEET=”Sheet2″.
proc import file="/folders/myfolders/import/shoes_sheet"
    out=work.shoes
    dbms=xlsx
    replace;
    sheet="Sheet2";
run;

proc print data=work.shoes (obs=6) noobs;
run;
If you want to import all the sheets of an Excel file, you can use the LIBNAME statement.
Import an Excel File into SAS with a LIBNAME Statement
The PROC IMPORT procedure is a convenient way to import an Excel file. However, you can also use the LIBNAME statement.
In this section, we demonstrate how to read Excel data with a LIBNAME statement into SAS.
How to Import an Excel File into SAS with a LIBNAME Statement
With the LIBNAME statement you can import Excel files. The statement starts with the LIBNAME keyword, followed by the library name, the XLSX keyword, and the location of the Excel file.
The name of the library can be up to 8 characters long and must start with an alphabetical character or an underscore.
The XLSX keyword lets SAS know to treat the file as an Excel file. Instead of XLSX, you can also use the Excel keyword.
The location of the file contains both the path and the name of the file. You write them between (double) quotes.
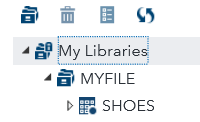
libname myfile XLSX "/folders/myfolders/import/shoes.xlsx";
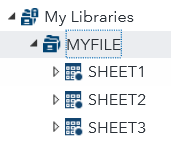
If you run the code above, SAS will create the library “myfile” and write a message to the log.

The image below shows the contents of the library.
How to Import Multiple Excel Sheets into SAS
In a previous section we showed how to import a specific sheet from an Excel file. This method works fine, but requires a lot of code if your file as many sheets. So, how to import all sheet from an Excel file into SAS?
The LIBNAME statement imports all sheets of an Excel file into SAS. It creates a library where each sheets is saved as a SAS dataset. The statement start with the LIBNAME keyword, followed by the name of the library, the XLSX keyword, and the location of the Excel file.
Hence, the LIBNAME statement provides a convenient and efficient way to import at once all sheets of an Excel file. However, it lacks the flexibility of the PROC IMPORT procedure to define the header, the first row with data, or the range you want to import.
Below we demonstrate how to import all sheets from the “shoes_sheet.xslx” file.
libname myfile XLSX "/folders/myfolders/import/shoes_sheet.xlsx";
If you run the code above (and refresh the Libraries), you will see that SAS created the library “myfile” with one dataset for each Excel sheet.
Once imported all the sheets, you can use the two-level name to access each dataset. For example, below we create a report of the first six rows of Sheet1.
proc print data=myfile.sheet1 (obs=6) noobs;
run;
Note that, you can use the LIBNAME statement also to export a SAS dataset to Excel.
Import an Excel File into SAS University Edition
So far, we’ve shown how to import Excel files with PROC IMPORT and the LIBNAME statement. However, if you work with SAS University Edition (or SAS Studio), you can read Excel data without writing code.
These are the steps to import an Excel file with the Import Data wizard of SAS University Edition
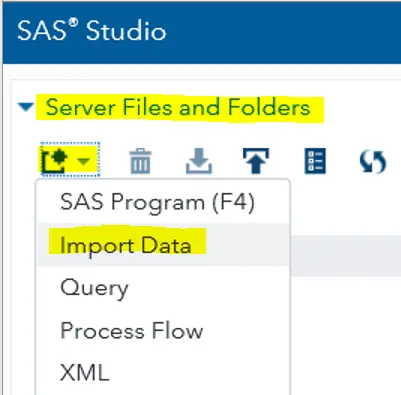
- Open the Import Data wizard.
You can find the Import Data wizard under the Server Files and Folders section. Click on New to open the Import Data wizard.
- Select the Excel file.
The second step is to select the Excel file you want to import. You can either drag-and-drop the file, or browse in your folders.
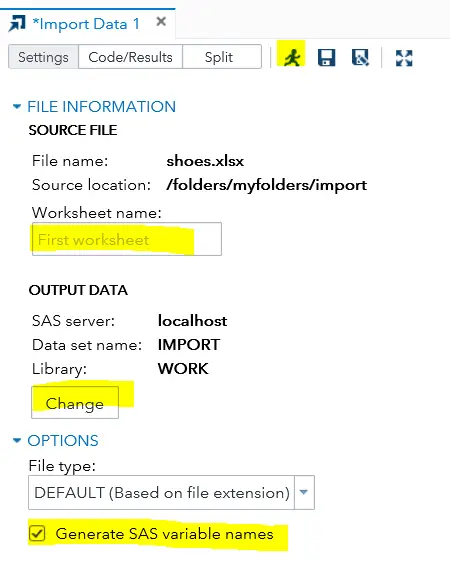
- Specify the Sheet you want to import
By default, SAS imports the first sheet. However, you can specify another sheet if needed
- Specify the name of the output dataset
You can specify where SAS saves the imported data, as well as the name of the dataset. SAS automatically overwrites existing datasets.
- Specify the header
The last option is to specify if the Excel file contains a header. If your file doesn’t contain a header, you need to uncheck the option “Generate SAS variable names”.
- Run the Import Data wizard
Import the Excel file by running the Import Data wizard.
Although, the Import Data wizard is convenient to import data without writining code, it has also its drawbacks. For example, you can’t import a range of data, or start reading data from a specified row.
Import an Excel File into SAS with a DATA STEP
In this article, we have demonstrated three methods to import an Excel file into SAS. Nevertheless, a common question is how to import an Excel file with a Data Step?
In contrast to a CSV file, you can’t import an Excel file with a SAS data step. To import an Excel file into SAS you need to use the PROC IMPORT procedure or the LIBNAME statement.

2 thoughts on “3 Easy Ways to Import an Excel File into SAS”
Comments are closed.